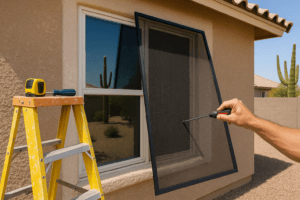
At Arizona Screen Company, we understand the importance of having well-maintained screens to keep pesky insects out while letting fresh air in. Damaged screens can ruin your comfort, but worry not! Our Ultimate Screen Repair Checklist will guide you through ensuring your screens are in top shape. Whether you’re a DIY enthusiast or need a little direction, this checklist has got you covered.
Contents
Inspect the Screen’s Integrity
First things first, examine the overall condition of your screen. Are there visible holes or tears? It’s crucial to identify any damage that might require immediate attention. We recommend checking frequently, especially after storms or strong winds.
If the screen is severely damaged, it might be time to replace it. However, smaller issues can often be repaired at home. Pay special attention to the corners, as they are usually more prone to wear and tear over time.
Determine the Material
Screens come in various materials, each with unique properties. It’s essential to know what you’re working with so you can select the right repair method.
Common materials include aluminum, fiberglass, and pet-resistant screens. Aluminum is sturdy but can dent easily, while fiberglass is flexible yet prone to tearing. Pet-resistant screens offer durability if you have furry friends who like to test boundaries!
Clean Before Repairing
Before initiating any repairs, give your screens a thorough cleaning. This will help you see any minute damages more clearly.
Use a soft brush or a vacuum with a brush attachment to remove dust and debris. For more stubborn grime, a mild soap solution can do wonders. Be gentle to avoid causing further damage before you even start the repair process.
Gather Your Tools
Being prepared means having the right tools on hand. Here’s a quick rundown of essentials you’ll likely need:
- Spline Roller: A tool designed specifically for seating the spline—the rubbery cord that holds the screen in place.
- Screen Repair Patch: Perfect for minor holes; they’re easy to apply and blend in seamlessly.
- Utility Knife: Handy for trimming and cutting screen material precisely.
- Replacement Spline: If the current spline is worn, having a new one ensures the screen stays taut.
- Measuring Tape: Always useful to ensure your replacement material will precisely fit the frame.
Fix Small Holes and Tears
Say goodbye to small holes using quick-fix options. Minor damages can be addressed effortlessly with simple patches or adhesive.
Screen repair patches are readily available and require minimal effort to apply. Simply trim the patch to size, place it over the tear, and press firmly. For fiberglass screens, you can even use a bit of clear nail polish to seal tiny holes.
Replace Damaged Sections
If you’ve got bigger fish to fry, it might be time to replace entire sections of the screen. Don’t let daunting tasks deter you!
Start by removing the old spline with a screwdriver or a similar tool. Gently pull off the damaged screen material, then lay the new screen over the frame. Use your spline roller to reset the spline, keeping the screen taut as you work your way around the frame.
Check the Frame
Scrutinize the screen’s frame for any signs of damage. A strong screen is only as good as its supporting cast.
Look for bends, cracks, or signs of rust that could compromise the screen’s functioning. If the frame is damaged, it may need replacing or reinforcing to ensure the screen sits securely and functions optimally.
Secure the Hardware
Are your screens rattling in the wind? It might be a hardware issue. Ensuring your screens are fastened properly will prevent trouble down the road.
Inspect for loose screws or broken fasteners. Tighten anything that’s become loose and replace components that have worn out. Stability is key to preventing further damage to your newly repaired screens.
Weatherproof with Extra Care
Arizona comes with its weather quirks, and your screens should be ready for all of them. Consider weatherproofing measures.
Applying a protective coating can extend the lifespan of your screens significantly. Additionally, checking the window seals and caulking can prevent moisture from sneaking in, keeping everything else in good condition.
Maintenance Tips
Finally, regular upkeep is the secret to long-lasting screens. A little TLC goes a long way.
Try to clean your screens a few times a year to avoid significant buildup. Revisit your screens every few months to ensure there are no new damages that require attention. The more proactive you are, the fewer repairs you’ll need in the future.
Ready to tackle your screen repair list? For professional help, Contact Us by phone at 480-771-2543 or Request a Free Quote. We’re here to make your screens pristine and your home a haven!


